For detailed information on how to get to the trailheads for these peaks, including waypoints for the drive and the climb, click on the link trailhead above and then click on the peak you're interested in. Scroll down or click here for details of the climbs we did on
NOTE: Regarding comments below about Kino, see also Steve's 2009 trip report, when we went back to climb Kino Peak!
See the Superstition and Weaver trailheads page for waypoints and driving details.
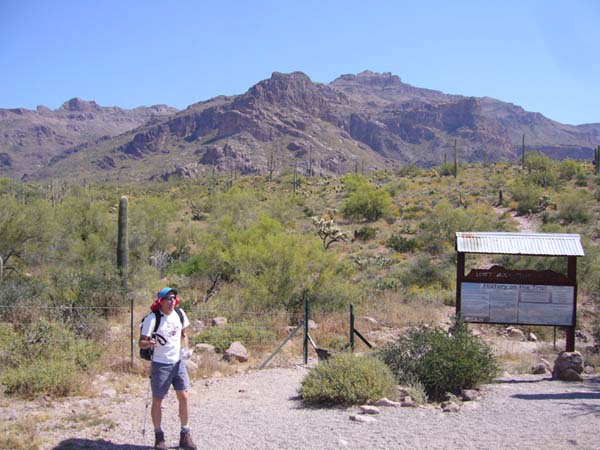
Early Sunday morning, Steve and I flew into Phoenix, rented a car, and drove to the Hieroglyphic Canyon trailhead for Superstition Mtn. only about an hour east of the airport. The DPS guidebook driving instructions (Route A) got us to the trailhead with no problem. However, the fast-growing suburbs of the Phoenix area appears to have reached all the way to the border of the Superstition Wilderness since the Guidebook driving instructions were written. Once we turned onto King Ranch Road, the drive to the trailhead is now marked with many trailhead signs through a neighborhood of recently built houses with nice desert landscaping, and is completely paved all the way to a large parking lot for the Hieroglyphic Canyon Trail (waypoint SUPRTH).
Daryn at the Hieroglyphic Canyon Trailhead. Superstition Mountain is in the background. Photo by Steve Eckert
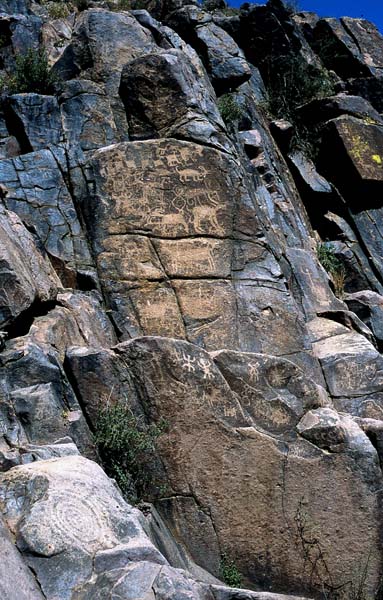
The 1.5 mile hike to the petroglyphs (waypoint SUPPET) is a popular weekend destination for Arizonians, as there were numerous groups of hikers on the trail. The trail is well-marked up into the canyon where it ended at some murky pools of water. A myriad of petroglyphs carved into the rock were above the water.
Some of the many petroglyphs at the end of the trail.
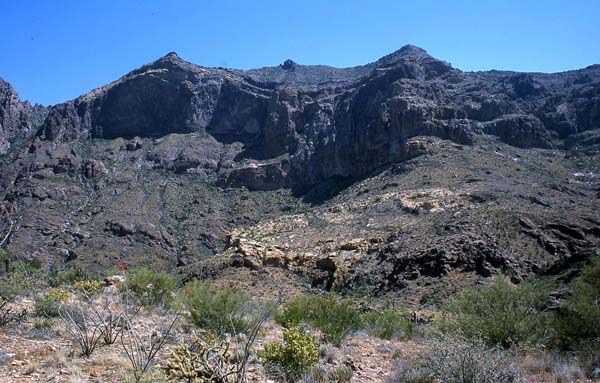
From the petroglyphs, we turned east up the slope and immediately left all the other canyon hikers behind. Our goal was an obvious and striking balancing rock on the ridge about 1000 feet above us (waypoint SUPBAL). The cross-country climb to the rock was somewhat brushy and ended with some class 2/3 rocks just below the balancing rock. But once on the ridge, the brush was less of a problem and a nice breeze could be felt. We soon ran across a vague use trail following the ridgeline to the summit, crossing a few class 2/3 rock bands along the way. The vast view of the Superstition range was marred by haze from a fire burning near the Mexican border. However, we could see Weavers Needle, our next days' climb. We could also plainly see where the border of the Superstition Wilderness starts near the trailhead far below us because the sprawling suburbs grow right up to its edge.
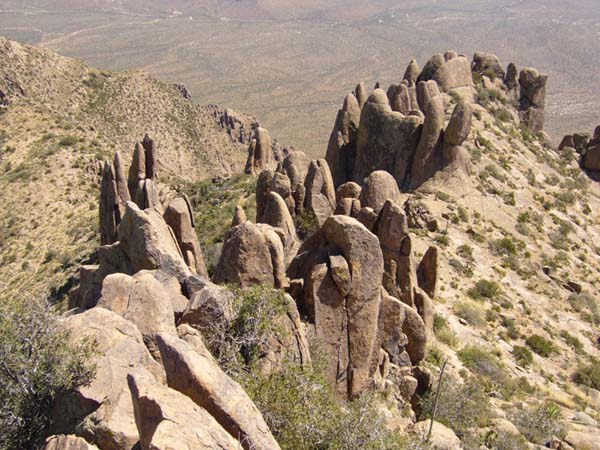
Rock formations on the summit of Superstition Mtn. Photo by Steve Eckert
Round-trip - distance was 6 miles in 5.5 hrs with 3000 feet of elev. gain.
After dinner, we made the short drive on Highway 60 to Peralta Road (waypoint H60PER) which leads to the trailhead for Weavers Needle (waypoint WEAVTH). The road is more extensively paved then the guidebook indicated, with suburban growth moving up Peralta road as well. But it eventually the road turned into a good dirt road. Our plan was to stay at Peralta Campground near the trailhead, but all it is is a few dirt turnouts and nothing else. We were self-sufficient having brought all the water and camp gear we needed, so we just pulled into one of the small primitive camp areas (waypoint PERCMP).
In the morning, we made the short drive to the rather large trailhead parking lot at the end of the road (waypoint WEAVTH). Currently, no fee is being charged for parking here (the DPS guidebook said a fee would be charged). We met John here for the Weavers Needle climb.
Of the two trail options for getting to the Needle, we chose the Bluff Springs trail (Route A in the DPS guidebook) which had the least elevation gain and loss. The trail forks twice within the first 10 minutes of hiking. To stay on the Bluff Springs trail, we took the right fork at the trailhead, then the left fork soon thereafter.
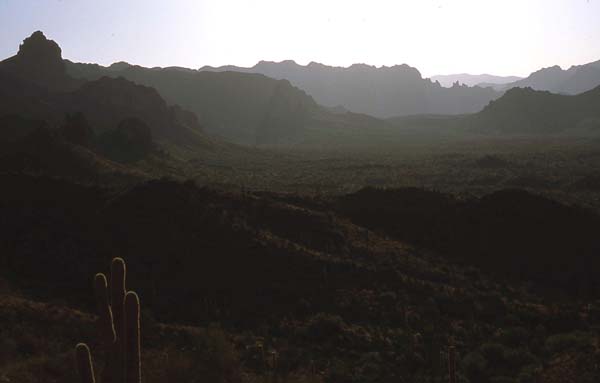
Early morning view of the Superstition range from the Bluff Springs trail.
The trail became vague after about mile 2 where it dropped into a large wash. The trail follows the stream bed when it is dry, which appears to be most of the year. We encountered only a few pools of murky water. There were some minor side-trails, suggesting hikers took alternate paths when the wash has much more water in it. The trail continued up the stream bed for several hundred meters, around waypoint WEAVCS, then turned up onto the left shore only to cross the wash to the right shore a minute or two later. We missed this junction where the trail crossed the wash and kept following the wash upstream. We soon discovered our mistake and left the wash to find the trail only 100 feet to our right. The wash does continue, but eventually ends in a tangle of thick brush and cliffs. I highly recommend staying on the trail.
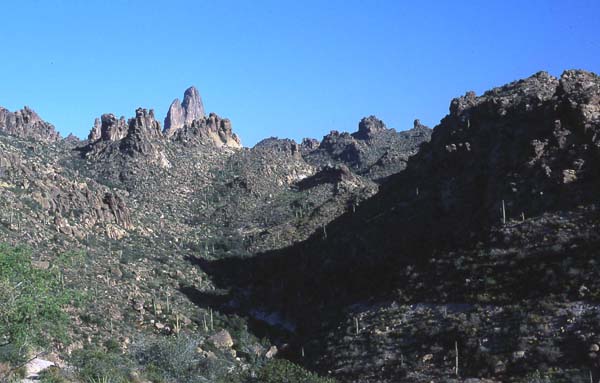
About this time we began to get our first views of Weavers needle looming over the ridgeline ahead.
First view of Weavers Needle above the ridgeline.
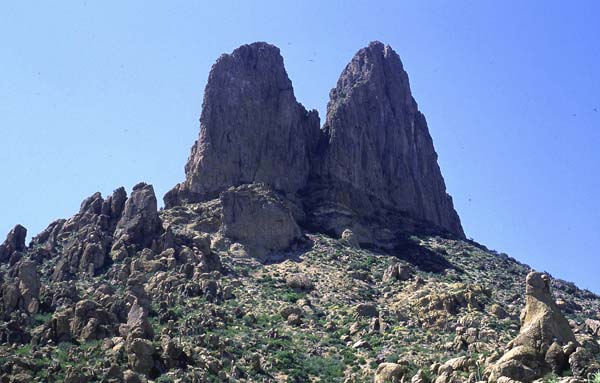
We left the trail (at waypoint WEAVXC) soon after we dropped over the Bluff Saddle, just as indicated in the DPS guidebook, and headed towards Weavers Needle. We came across a use trail and followed it over a low ridge for about a half mile before it became almost nonexistent in brush on the slopes of the Needle itself. We entered the obvious chute that starts a couple hundred feet below the cliffs, staying on the right side to get around trees and brush. We climbed around a massive chockstone on the right (easy class 3) that we saw from far below.
Weavers Needle from the northeast. The class 4 route goes up the prominent chute to the V notch.
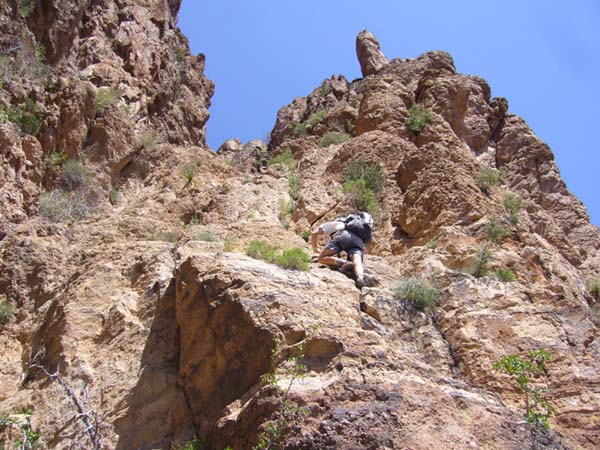
Reaching the base of the east face cliffs (waypoint WEAVEF), where the climbing abruptly changes from class 2 to 4, I put on my rock shoes and started up the far right side of the chute as indicated in the DPS guide. There were a few difficult class 4 moves, which some climbers have suggested may be closer to class 5 than 4. About 25 feet up I went too far into the middle of the chute and decided it was a no-go. After I contemplated my predicament for a moment, Steve suggested I move back the right edge of the chute. After another minute of reflection, I worked my way back to the right side of the chute, went up another 15 feet and got onto a small platform where I placed a medium-sized cam and chock in a crack in the wall. The hardest part of the climb was now over. Just above and towards the middle of the chute were both a piton and a hanger driven into rock. I tied in here too and continued up to the obvious belay station, a rock with numerous slings around it.
Daryn climbing the most difficult section. Photo by Steve Eckert
After belaying John and Steve up, we left the rope at the belay station and now climbed up towards the left side of the chute, squeezed up through a narrow slot, and finally up to the top of the V notch. The climbing above the belay station to the V notch went class 3. The climbing above the notch was just as described in the DPS guidebook. A use trail above the short class 3/4 wall out of the V notch pretty much takes the mystery out of the remainder of the climb; mostly class 2 with a few class 3 sections. We brought along another rope, but didn't pull it out on the way up. Just below the summit was a 20-foot wall that could go either class 3 or 4, depending on your definition.
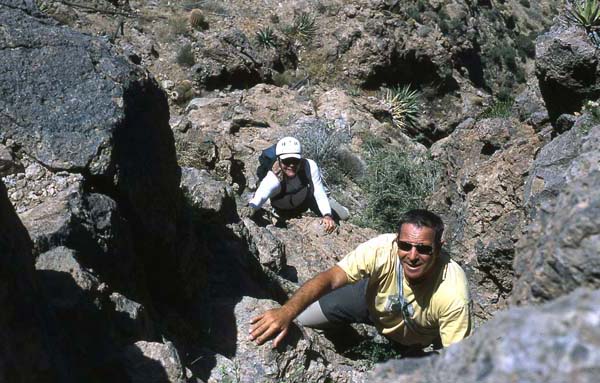
Steve and John ascending the 20-foot class 3/4 section just below the summit of Weavers Needle.
Again the air was smoky, so the views from the summit seemed muted. However, Superstition Mtn looked quite impressive from our vantage point. On the way down, Steve and I used our other rope on a new rappel station someone recently put in just below the summit. Quite fun! It's a heavy steel chain drilled into the rock about 20 feet to the east of the class 3/4 section. The 48-meter rope we brought up worked fine for this. The down-climbing back to where we left our 60-meter rope at the belay station is not particularly difficult and can be done without a rope by reasonably confident class 3 climbers. Otherwise, there are a few places climbers may want to rappel. The rock on Weavers Needle is somewhat like decomposing granite and this may be enough to convince some that rapping down most of the way is a safer option.
Back at the belay station, all three of us rapped back down the last 90 feet. We used the 60-meter rope for a double rope-rap. The length was just right; a 50-meter rope would have been too short. The DPS guidebook says two ropes are necessary for the climb to the V notch. However, a small group of reasonably confident climbers will only require one 60-meter rope to protect the entire climb.
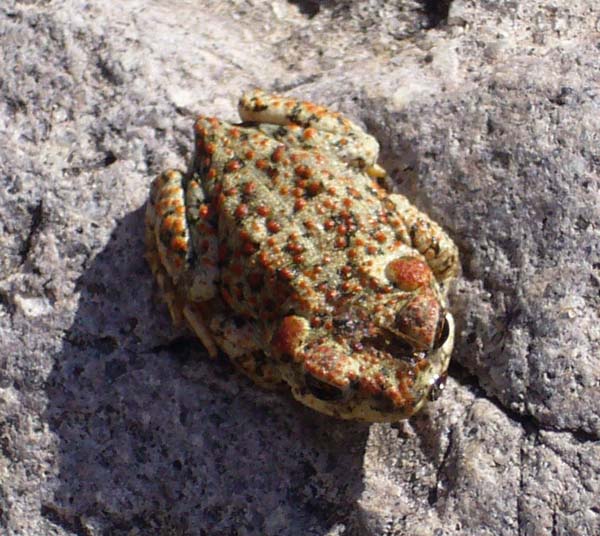
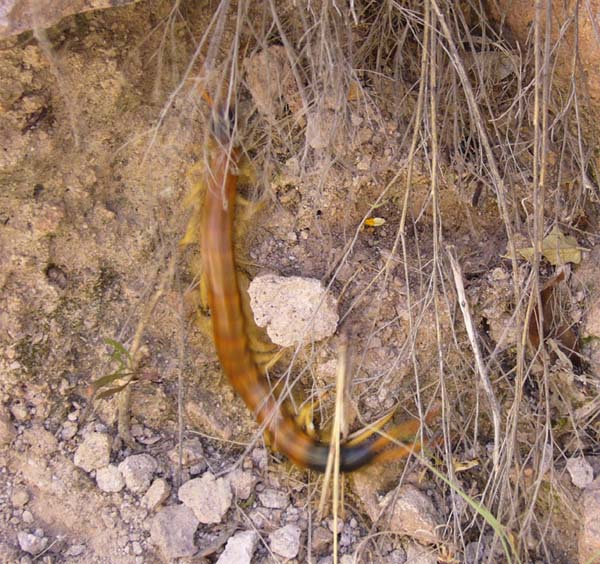
Our walk back to the cars went smoothly even though it was warming up. I went through all 3 quarts of water I had brought. The wildlife here in the Sonoran Desert seems more apparent than in our own Mohave Desert. Birds, butterflies, toads and giant centipedes all made their presence known.
Desert toad. Photo by Steve Eckert
Fast moving giant centipede spotted on the trail. Photo by Steve Eckert
The round-trip stats were 10 hrs and 10 miles and 2600 feet of gain. After a celebratory beer courtesy of John, we drove to a Gila Bend motel for the night. Mt. Ajo up next tomorrow.
See the Mt Ajo trailhead page for waypoints and driving details.
It took us about 3 hrs this morning to drive from Gila Bend to the trailhead for Mt. Ajo. My wife, who speaks Spanish, tells me Ajo means garlic. Rest assured we saw no garlic today. Perhaps the first people to see Mt. Ajo were very imaginative and thought it looked like a giant garlic bulb. Look at the photo below and judge for yourself. Before we started today's dayhike, we stopped in at the Organ Pipe Cactus National Monument Visitor Center (waypoint AJOVIS) and paid the Monument entry fee (free with a National Park pass).
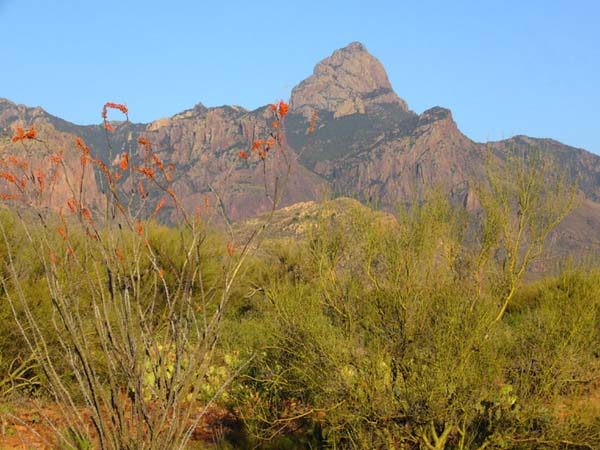
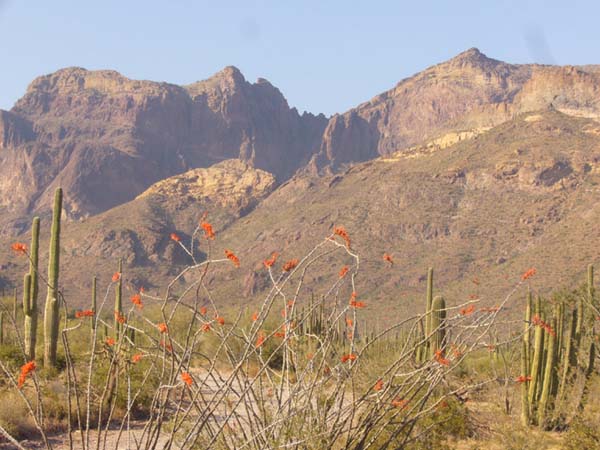
If you enjoy desert scenery, you'll probably find the Ajo Mountain Loop Drive quite appealing (waypoint H85AJO). The desert flora in this area is so nicely organized that it appears to have been set-up by a landscape architect. And the plentiful Ocatillo were in full bloom (Ocatillo bloom during the month of April). Simply dazzling! Also, this is the only place in the U.S. to see organ pipe cactus, which grow on southern slopes where the sun rays are most intense. However, there's not much else to see here in Organ Pipe Cactus NM. So children (and climbers) may get restless after a while.
Organ Pipe Desert Scenery: Ocatillo in bloom, Ajo Range in background. For completeness, those are two Saguaro cacti on the far left, and an organ pipe cactus on the far right. Photo by Steve Eckert
We did ask about climbing Mt. Kino at the Visitor Center. The ranger interpreter there said the road is open to visitors, but hiking south towards Mt. Kino is highly frowned upon. She wavered on whether we would be cited. There's a desert highway through the Kino Mtns for illegal immigrants and the occasional drug runner. Steve asked, If it's a known popular route for illegals, why hasn't the Border Patrol got it under control? To which the ranger interpreter had no answer. My interpretation is that the Border Patrol doesn't bother trying to catch them in the hilly areas around Mt. Kino...too many places to hide. They'll just wait for the illegals farther north where it's open desert. There is the possibility that unattended vehicles parked on the Bates Well road may get broken into for water and shoes, which was the deal-breaker for us. Anyway, after some more discussion with the ranger, it seems that if climbers insist on going into the Kino area, there's nothing really to stop them. But if climbers get caught hiking/climbing in the area, they'll be asked to leave...with probably just a warning the first time. (NOTE: See update in Steve's 2009 trip report.)
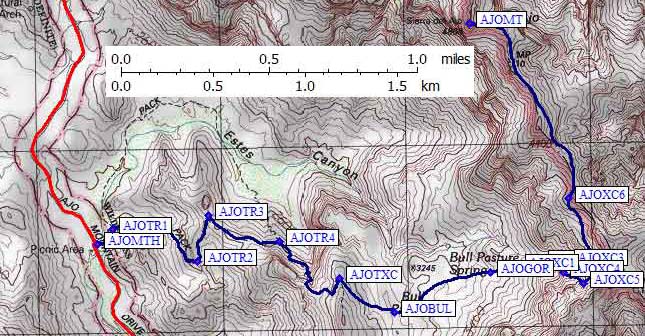
Because we did not start hiking till after 10 am, the temperature was getting rather warm. We followed the Estes Canyon trail (from waypoint AJOMTH) for a little under 2 miles until we crested a saddle with a view of Bull Pasture. This meadow is very green during winter, but alas, was all brown when we were there. There was a sign-in box on the saddle, where the official trail ends. A use trail continues from here around the west side of the meadow area. The DPS guide says to aim for smooth weathered pinnacles in chute at a bearing of 83 degrees, which John easily spotted after scanning the ridgeline in front of us.
Ajo Range from the Bull Pasture trail. Mt. Ajo is the high point on the left.
We started following the use trail, but left it after less than a half-mile (at waypoint AJOTXC) and walked sidehill slightly downhill across the pasture towards the chute with eroded pinnacles, as directed in the DPS guidebook. However, the guidebook left us somewhat confused beyond this point, suggesting one must bushwhack through the chute and ascend up the left side until a use trail is found. Don't do this! When cutting across the pasture towards the gully, what one should do is go right around a very narrow deep gorge (waypoint AJOGOR is the head of the gorge) and aim for some large boulders (waypoint AJOXC1) on the slope to the right before entering the gully. You will find the same use trail again in among, or just above, these boulders (waypoint AJOXC2.
As we found out on our way back, the use trail actually continues past Bull Pasture to another low saddle area, then comes back north and continues all the way to the summit. One can choose to follow the use trail all the way to the summit. But the easy cross-country short-cut across Bull Pasture will save about a mile on the round trip distance and some up-and-down.
In the chute itself, the use trail is in good shape and easy to follow...just a little steep in places. Stay about 100' above the canyon floor on the south side, skirting left of the weathered pinnacles. The trail passes a natural bridge (waypoint AJOXC4), which made for a photo opportunity. I found a ten dollar bill in the bushes here, but I must apologize to whoever left it there because I have already spent it. The DPS guide says you cross the canyon at the base of the cliffs, but in fact the use trail climbs above the cliffs on the right and traverses ABOVE them (starting at waypoint AJOXC5). Keep track of the use trail, as it crosses from side to side on the ridge and sometimes traverses level before climbing steeply, because it's the only way to avoid pokes and scrapes from the widely varied plant life.
Steve enjoying a moment under a natural bridge.
The use trail eventually reached the ridgeline for some nice views and cool breezes. It then skirts around the east side of a false summit, and continues on to the high point of Mt. Ajo, just west of the radio towers on the peak. The peak itself is made up of an interesting rock conglomerate that is relatively resistant to weathering. It's difficult to discuss the worthiness of the view, because we were still plagued with hazy conditions from a fire burning near the Mexico border.
See the Baboquivari trailhead page for waypoints and driving details.
The DPS drive instructions (Route A) got us to Baboquivari Campground with no problems. However, be aware that the turnoff in the town of Sells (waypoint H86SEL) may be not marked well, if at all. Also, the dirt road to the campground is in good shape, but I would not call it excellent dirt road anymore.
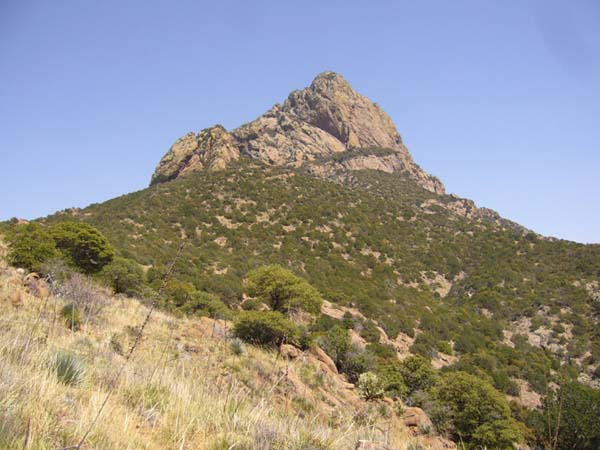
View of Baboquivari Peak from the dirt road leading to the campground. Photo by Steve Eckert
I had called ahead to make reservations for the campground. All that was requested was the car license plate and description, and the name of the people staying there. Normally, this campground does not have many visitors. But it turned out that there was an overnight campout of about 50 school children and supervisors in the campground (waypoint BABOTH), which completely filled it up. So we pulled onto a side road that led to a primitive campsite next to the steel water tank described in the DPS guide (waypoint BABTR1). The trail passes right by the water tank. That evening we could hear the children and adults singing American Indian chants, which was quite enchanting.
We started hiking at 6 am. We made a sharp right at the junction (waypoint BABTR2) at about 0.3 mi as indicated in the guide. The trail took us south out of the basin we were in and around the corner of a sharp rocky ridge. This was a little disorienting because we could see the top of Baboquivari Peak at the campground and it seemed we were now moving away from it. However, the trail begins a more direct and steeper ascent once around the rocky ridge. The trail was in shadow most of the morning, which kept the temperature just right for hiking. At 5600 feet (near waypoint BABTR5), we entered an oak and pine forest which got thicker as we ascended.
Baboquivari Peak from the trail. The up and left leaning ramp is seen cutting cross the west face of the peak. Photo by Steve Eckert
The trail led us from the forest to a talus chute (waypoint BABOXC) where we could see the sloping ramp above heading up and left. You know you are in the correct chute when you begin passing old, splintered two-by-fours littering the chute near the ramp. We found a few of these at the base of the chute as well. In the lower part of the sloping ramp, there are a number of old bent pipes sticking out of it. According to a elderly Native American Indian I talked to in the campground, a ladder had been constructed here during the depression in the 1930's by a CCC crew, or a similar group. It didn't last very long because it was demolished long before he first climbed Baboquivari in the early 1980's.
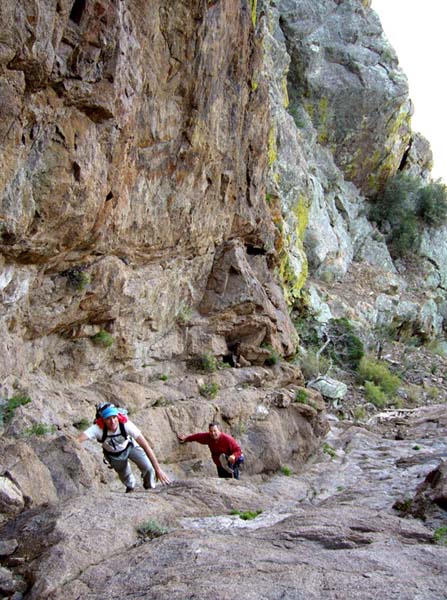
Daryn and John climbing the lower section of the sloping ramp. Photo by Steve Eckert
The lower portion of the ramp is rather smooth rock and goes class 3. The ramp leads into a use trail through trees and brush and eventually to the legendary class 4 wall (waypoint BABOC4). You know you are at the right place because more rusty bent pipes are sticking out of the wall about 80 feet above. A ladder had been built over this section as well. The small oak tree used as a belay point at the top of the wall is also fairly obvious. After a little study, we could also see hangers in the rock. I got on my rock shoes and started up dragging the rope. The rock here was more solid and fun than on Weavers Needle. Similar to Weavers Needle, the crux of the climb is the first 20-30 feet, although Baboquivari's class 4 wall is easier.
Contrary to the DPS guidebook, the first hanger is almost 30 feet up. Someone had also put another in beside the old one recently, but is loose. Another 25-30 feet up is another set of hangers, one new, one old. The last part of the climb to the oak tree went easier and I did not use any of the old pipes to tie in to. In addition to the new hangers, a relatively new rappel point consisting of a heavy steel chain has been placed in the rock beside the oak tree. It is the same kind of chain set-up as the rappel station just below the summit of Weavers Needle. However, using the small oak tree as a belay station to bring up Steve and John was both easier and safer.
From the tree we turned right (south) to get into the next chute, where we turned back towards the left going around the chockstone. Above the chockstone we mostly followed a use trail over easier terrain with the exception of a few class 2/3 moves. The view from the summit (waypoint BABOQP) easily surpassed the view of any of the other peaks were had visited this trip. It stood alone much higher than any other point for many miles. Crows cavorting around in the sky were our constant companions while on the summit. They gave us some amazing displays of flying agility.
Steve, John and Daryn on the summit of Baboquivari Peak. The observatories on Kitt Peak are just visible in the background. In the foreground are the summit rocks with the many offerings to the mountain left by other climbers. Photo by Steve Eckert
On the descent, our 60 meter rope worked fine for a double rope rap down the class 4 wall. A 50 meter rope would have worked too. Back at the cars, we all agreed that the Baboquivari dayhike was by far the best of the trip.
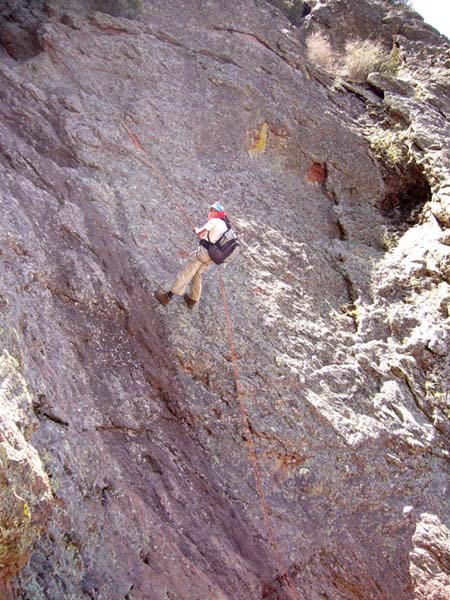
Daryn rapping off Babo. Photo by Steve Eckert
Superstition Mountain (elev. 5057 ft)
Weavers Needle (elev. 4553 ft)
See the Superstition and Weaver trailheads page for waypoints and driving details.
Mt. Ajo (elev. 4808 ft) and Mt. Kino, Not!

Baboquivari Peak (elev. 7734 ft)